Hi everyone!!! I'm Tawny and I blog over at Tawny's Tid Bits. I'm taking over Kate's blog today because we signed up for the Chaotic Goddess Swaps and were so lucky to receive each other as partners.
Just a little about me before I bring you a DIY project (which it seems Kate and I both have in common).
You can learn a little about me here.
I'm a fairly new blogger (February 2013) and I love it, although sometimes I have my blogger ruts. Who doesn't?
What does Tawny mean? I knew of the definition, but I wanted to know more.
I ran my first 1/2 marathon this year and plan to do it again next. Will I ever do a full one? Ehh.. not sure.
I love Tough Mudders!
My husband and I just celebrated our 4 year anniversary!
I love to geocache in my spare time! It's a form of free fun (well you gotta pay for gas).
I have a linkup every Sunday, Instagram Recap.
I have spelunked before, LOVED IT!! I want to do the 6-8 hour one, just haven't made the appointment yet.
I love DIY's..... about 70% of the time it is a success. Other times, not so much!
I love to cook and try out new recipes when I have the time.
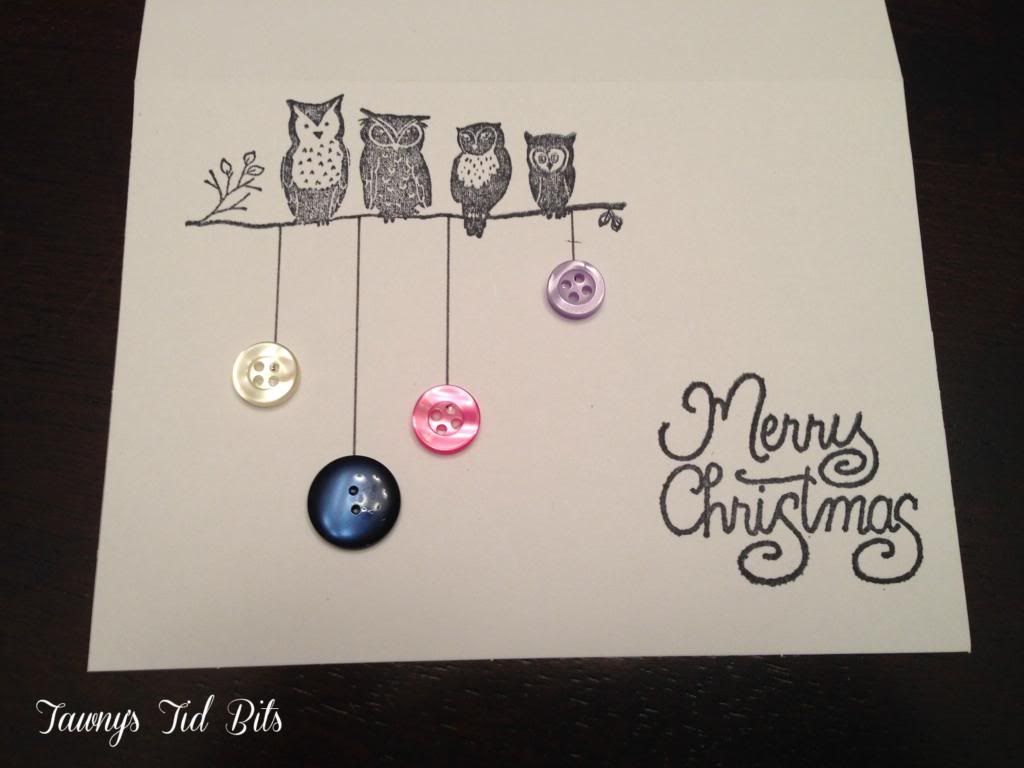
Now onto the DIY stuff!!!! Christmas time is just around the corner so what better time to get started on DIY cards. I've found plenty on Pinterest, but for some reason this caught my eye. Simple, yet cute!
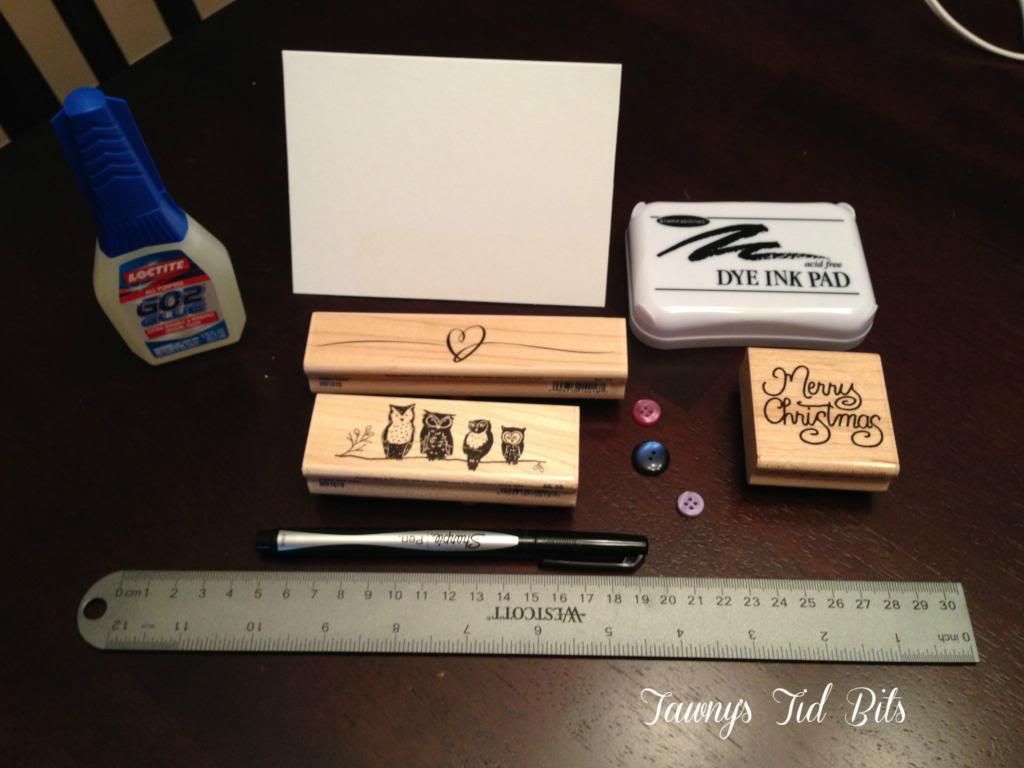
You'll need:
- A notecard of choice.
- Super glue or plain ol' glue will do.
- Ink pad
- Merry Christmas or Happy Holiday's stamp of choice
- Any kind of stamp with birds sitting on a branch.
- Ruler
- Color, size, and number of buttons is up to you.
- Black pen
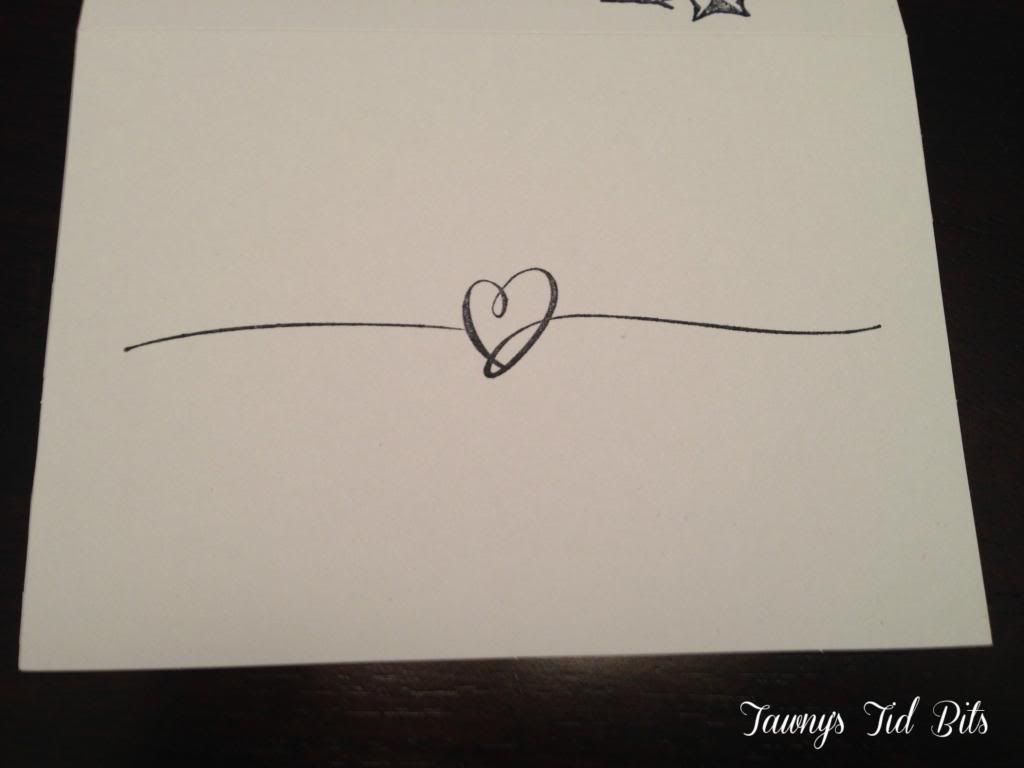
- Stamp for the back of the card (optional)
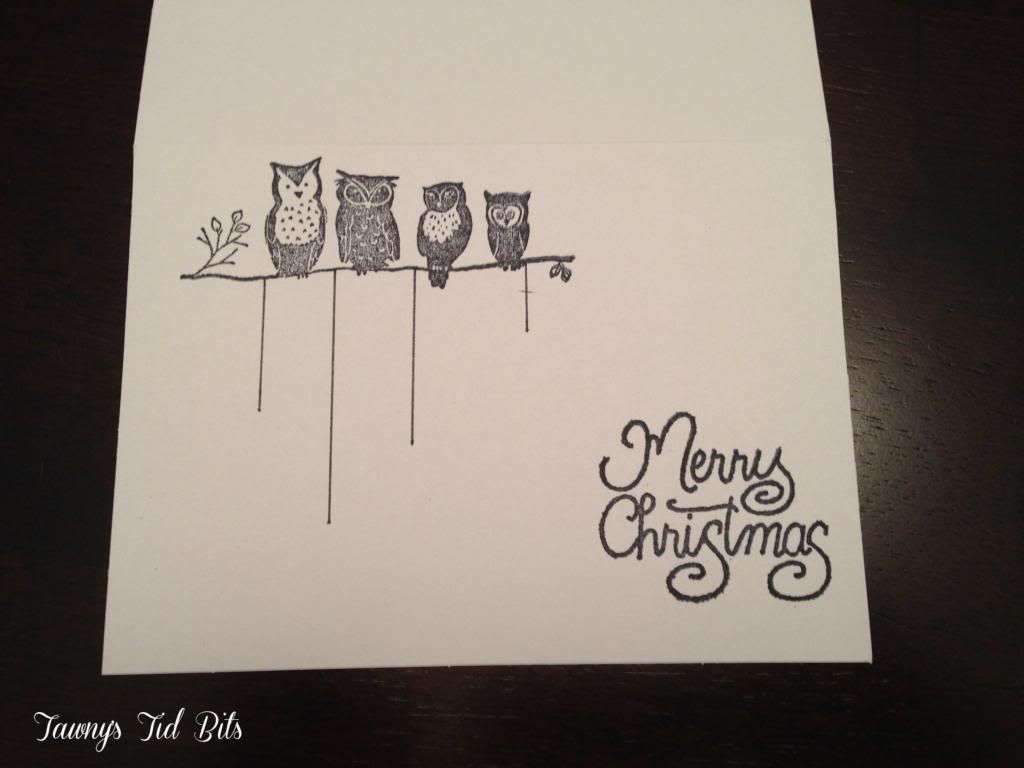
You'll stamp the birds either at the top left or the top right, choice is up to you. Then you'll stamp the Merry Christmas at the opposite side on the bottom. You want room for your "ornaments".
Use your ruler to draw straight lines at whatever length you please.
Glue your buttons on.
 |
Hope you enjoyed it and be sure to check out my Pinterest board for card making!
Be sure to stop by any of my social media pages and say hello! Love to meet new bloggers!


What an adorable idea, Tawny! And a great use for those random decorative buttons I have sitting in my sewing room....thanks!
ReplyDeleteAnd thanks to both of you for joining us for the swap...I'm glad you're DIY-in-common is a bonding point, and hopefully provides mutual inspiration.
Such a great idea, indeed! This year I made a brunch of cards as well. Now is the hardest thing - to give them away ;)
ReplyDeleteAnd I love to geocache too! Such a super great activity! I know that in States are a lot of lot of more caches than in my country, but we have something special - on 2012, 18th of November is Latvia's (my country) birthday and some geocachers made a great gift - the whole border of our country covered by special multi caches :) Ok, that was just a fun fact for Tawny, now I am off to Tawny's blog ;)